 Save to Pinterest
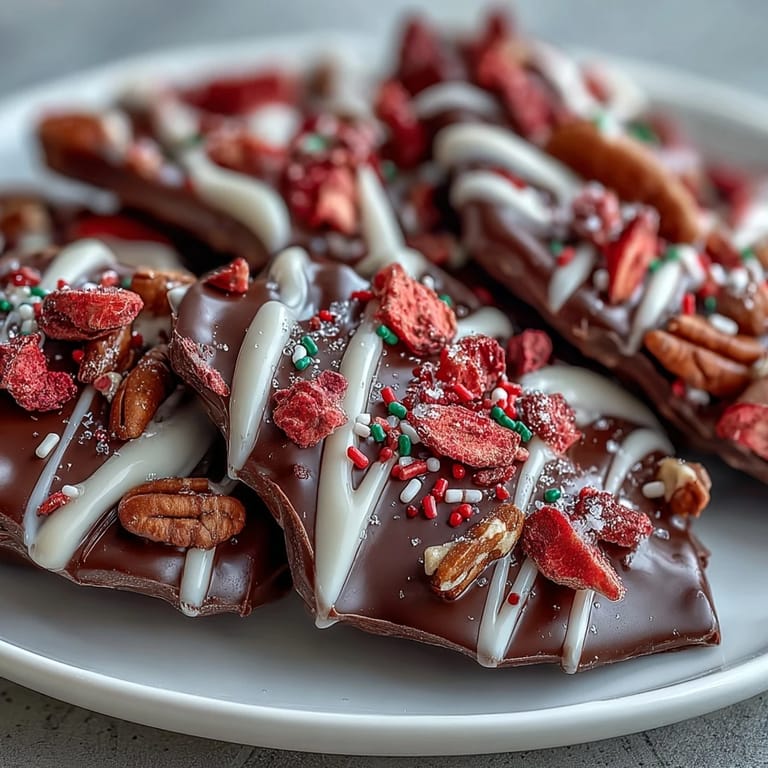
 My sister texted me a photo of a chocolate bark she'd seen online, and I knew immediately it had to be our Valentine's Day tradition. There's something about the simplicity of melted chocolate and bright strawberries that felt like less of a recipe and more of an invitation to slow down. I'd made candy before, but this one stuck with me because it required almost nothing except patience and a good eye for when the white chocolate drizzle looked chaotic enough to feel intentional. The first batch came together in my tiny apartment kitchen while rain drummed against the window, and by the time it set, I couldn't stop sneaking pieces before wrapping them up for friends.
I'll never forget handing a box of this bark to my neighbor on Valentine's Day and watching her face light up like I'd done something impossibly complicated. She told me weeks later that she'd eaten half the box in one sitting, which I took as the highest compliment. That's when I realized this bark wasn't just about the chocolate—it was about the moment of connection, the small gesture that somehow feels personal even though it takes less time than a phone call.
Ingredients
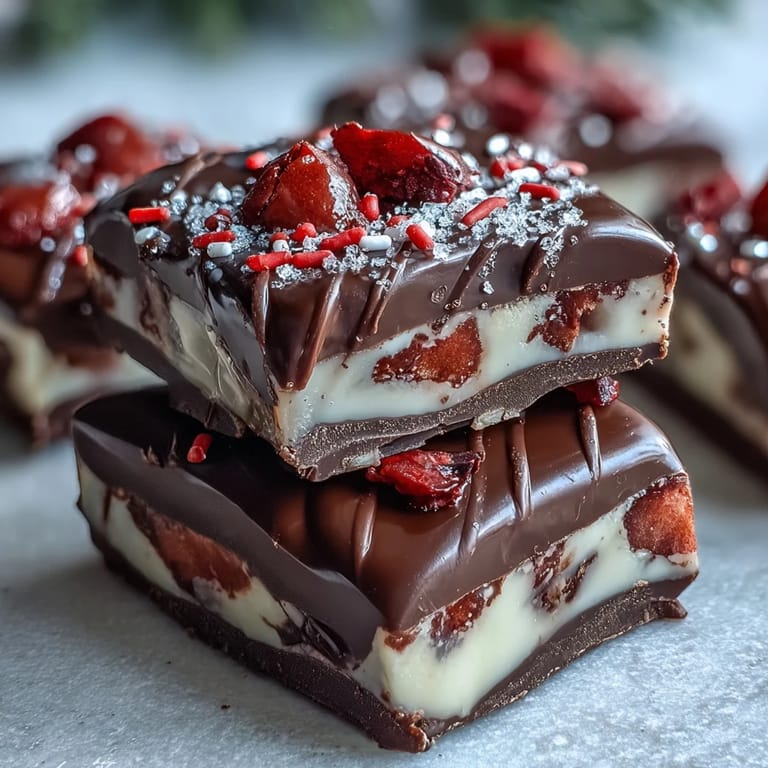
- High-quality dark chocolate (200 g, 60–70% cocoa): The backbone of this whole thing—buy chocolate you'd actually eat straight from the bar, because that quality shows through in every bite.
- White chocolate (100 g): This creates that beautiful marbled effect, but make sure it's real white chocolate and not the waxy stuff, or it'll set weird and feel greasy.
- Freeze-dried strawberries (30 g, lightly crushed): These are the secret weapon; they're tart, they crunch, and they won't make your bark soggy like fresh berries would.
- Valentine-themed sprinkles (2 tbsp): This is where personality comes in—use whatever feels festive to you, but tiny pearl sprinkles look more elegant than chunky ones.
- Chopped pistachios or sliced almonds (1 tbsp, optional): If you go this route, toast them first for a deeper flavor that plays well with chocolate.
Tired of Takeout? 🥡
Get 10 meals you can make faster than delivery arrives. Seriously.
One email. No spam. Unsubscribe anytime.
Instructions
- Set the stage:
- Line your baking sheet with parchment paper so nothing sticks and cleanup feels like a breeze later.
- Melt the dark chocolate:
- Use a double boiler if you have patience, or microwave in 30-second bursts if you're in a hurry—either works, just stir until it's smooth and glossy without any grainy bits. The sound of a spatula scraping the bowl is oddly satisfying at this point.
- Spread the foundation:
- Pour the dark chocolate onto your parchment and spread it into a rough 8x10 inch rectangle using a spatula, working gently so you don't tear the paper. It doesn't need to be perfect—irregular edges actually look more artisanal.
- Melt and drizzle the white chocolate:
- Melt your white chocolate the same way as the dark, then drizzle it over the dark chocolate base in loose, wandering lines. Don't overthink this part; spontaneous always looks better than planned.
- Create the swirl:
- Take a toothpick or the tip of a knife and drag it through the white chocolate lines in random directions, creating that marbled effect that makes it look like you went to culinary school. Work quickly because the chocolate is still warm and willing to move.
- Add the toppings:
- Immediately—and I mean right away while the chocolate is still slightly tacky—sprinkle on your freeze-dried strawberries, sprinkles, and nuts if you're using them. Gently press them down so they stick around for the long haul.
- Let time do the work:
- Slide everything into the refrigerator for 30 minutes, resisting the urge to check on it every five minutes. The cold air will set the chocolate firm and make breaking it into pieces feel satisfying, like a little snap and crack.
- Break and share:
- Once it's completely set, run your hands over the bark and break it into shards—irregular pieces actually taste better somehow, probably because they have more surface area for the toppings to catch your tongue.
 Save to Pinterest
 There was a moment last February when my friend called me from her kitchen to say she'd made this bark for her kids' school fundraiser and it sold out before lunch. She didn't tell me that was coming—she just wanted to share that small victory, that thing we'd made together had turned into something bigger. That's what this recipe does; it gives you permission to make something beautiful without needing a reason beyond the fact that you can.
The Art of the Double Boiler
Melting chocolate in a double boiler feels fussy at first, but it's honestly the move if you want glossy, smooth chocolate that doesn't seize up into a grainy mess. The steam from the water below gently warms the bowl without direct heat, which keeps the chocolate from getting too hot and angry. I learned this the hard way after ruining a batch by getting impatient and cranking the heat, watching the chocolate go from silky to seized in what felt like a single second. Now I actually enjoy the slower pace—it gives me time to breathe and not rush into the next step.
Customization Without Limits
The beauty of bark is that it's genuinely a template, not a rigid rule. You can swap the freeze-dried strawberries for raspberries, dried cranberries, or even candied citrus peel and nobody will judge you. I've seen people add shredded coconut, crushed honeycomb, mini marshmallows, or even a sprinkle of sea salt on top of the chocolate while it's still soft. The only real rule is that whatever you choose should either crunch, add tartness, or bring unexpected flavor—something that makes people pause mid-bite and wonder what they're tasting.
Gifting and Storage
This bark lasts up to a week in an airtight container kept somewhere cool, which means you can make it days ahead without stress. I like to wrap pieces individually in parchment or cellophane with a small twine bow—it feels more thoughtful than just tossing it in a box. Bark also travels well, stays intact through car rides, and looks impressive sitting on a shelf or tucked into a gift bag, which makes it the perfect last-minute or planned-ahead gesture.
- Keep it away from humidity or it'll start to sweat and lose that satisfying snap.
- A tight seal is your friend—exposure to air makes the chocolate dull and waxy after a few days.
- If you're gifting this, include a note saying it keeps for a week so people don't think they need to eat it all at once.
 Save to Pinterest
 This bark has become my go-to whenever I need to feel like I've done something thoughtful without losing my mind in the process. It's the kind of recipe that reminds you why you love being in the kitchen in the first place.
Recipe FAQ
- → What types of chocolate work best?
High-quality dark chocolate (60–70% cocoa) provides a rich base, while white chocolate creates a sweet marbled topping. Milk chocolate can be substituted for a sweeter flavor.
- → Can I add different toppings?
Yes, customize with dried raspberries, shredded coconut, mini marshmallows, or nuts such as pistachios and almonds for varied textures and flavors.
- → How long should the bark chill?
Chill the bark in the refrigerator for about 30 minutes until fully set and firm enough to break into pieces.
- → Is this suitable for gluten-free diets?
Using gluten-free sprinkles and chocolates ensures this treat remains gluten-free. Always verify ingredient labels.
- → What is the best method to melt chocolate?
Melting chocolate over a double boiler gently heats it without burning, but microwave melting in short bursts with stirring works well too.