 Save to Pinterest
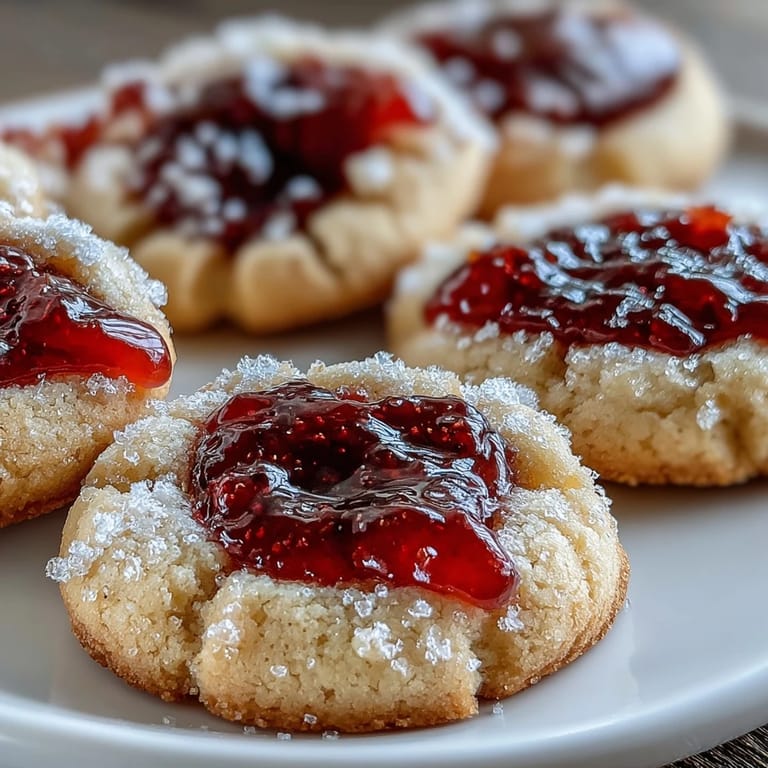
 My cousin called me on a Thursday afternoon asking if I could bring dessert to her backyard picnic the following day. I stood in my kitchen thinking about what travels well, stays fresh, and doesn't require forks—and suddenly remembered my grandmother's thumbprint cookies, those buttery little bites with jam centers that somehow taste more summery than any other cookie I know. The beauty of these isn't just in their simplicity; it's in how they transform ordinary afternoon gatherings into something memorable.
I baked three dozen the night before, and something about pulling warm cookies from the oven while the sun was setting felt restorative. My kitchen smelled like brown butter and strawberries, and I caught myself just sitting with a cup of tea, eating one still-warm from the rack before packing them away. When I arrived at that picnic the next day and watched people reach for seconds and thirds, I understood why my grandmother made these every summer without fail.
Ingredients
- Unsalted butter, softened (1 cup): Room temperature butter creams properly with sugar and creates that tender crumb that makes these cookies special; cold butter just won't cooperate the same way.
- Granulated sugar (2/3 cup): This amount sweetens without making the cookies cloying, letting the butter flavor and jam shine through.
- Pure vanilla extract (1/2 teaspoon): A small amount deepens the shortbread flavor without overpowering it; don't skip it even though it seems minimal.
- Salt (1/4 teaspoon): This is your secret weapon—it balances sweetness and makes every flavor pop brighter.
- All-purpose flour (2 cups): Measured by weight if possible; too much flour makes cookies tough, so spoon and level rather than scooping directly from the bag.
- Strawberry jam, seedless (1/2 cup): Seedless works better because seeds can shift during baking, but honestly any jam you love will work—this is your chance to use what speaks to you.
- Powdered sugar for dusting (2 tablespoons, optional): A light dusting at the end adds a pretty finish and a subtle sweetness that feels almost elegant.
Tired of Takeout? 🥡
Get 10 meals you can make faster than delivery arrives. Seriously.
One email. No spam. Unsubscribe anytime.
Instructions
- Get your oven and workspace ready:
- Preheat to 350°F and line two baking sheets with parchment paper. This step takes one minute but saves you from scrambling later when dough is ready to bake.
- Cream butter and sugar into fluffy clouds:
- Beat them together for 2–3 minutes until the mixture looks pale and airy, like you've captured clouds in a bowl. This step is worth the full time because it incorporates tiny air pockets that make cookies tender.
- Add vanilla and salt:
- Mix these in with a few quick beats. The salt dissolves instantly and the vanilla releases its warmth into the dough.
- Fold in flour gently:
- Add flour gradually and stir just until the dough comes together; once you see no dry flour streaks, stop. Overmixing develops gluten and tightens the crumb, which is the opposite of what we want here.
- Shape dough into balls:
- Scoop tablespoon-sized portions and roll them between your palms into smooth balls, then place them 2 inches apart on your prepared sheets. They'll spread slightly, so give them space to breathe.
- Make the jam wells:
- Press your thumb or the back of a rounded teaspoon into the center of each ball to create a small indentation; you want a shallow well, not a crater. This is almost meditative—I find myself getting into a rhythm with this step.
- Fill with jam:
- Drop about 1/2 teaspoon of jam into each indent. The jam will spread a little as it bakes, so resist the urge to overfill.
- Bake until edges turn golden:
- Bake for 13–15 minutes, watching for the edges to deepen to a light golden color while the centers stay pale and tender. The cookies will continue setting as they cool, so don't wait until they look fully done.
- Cool before moving:
- Let them rest on the hot pan for 5 minutes before transferring to a cooling rack. This prevents them from breaking apart when they're still too delicate.
- Add sparkle if desired:
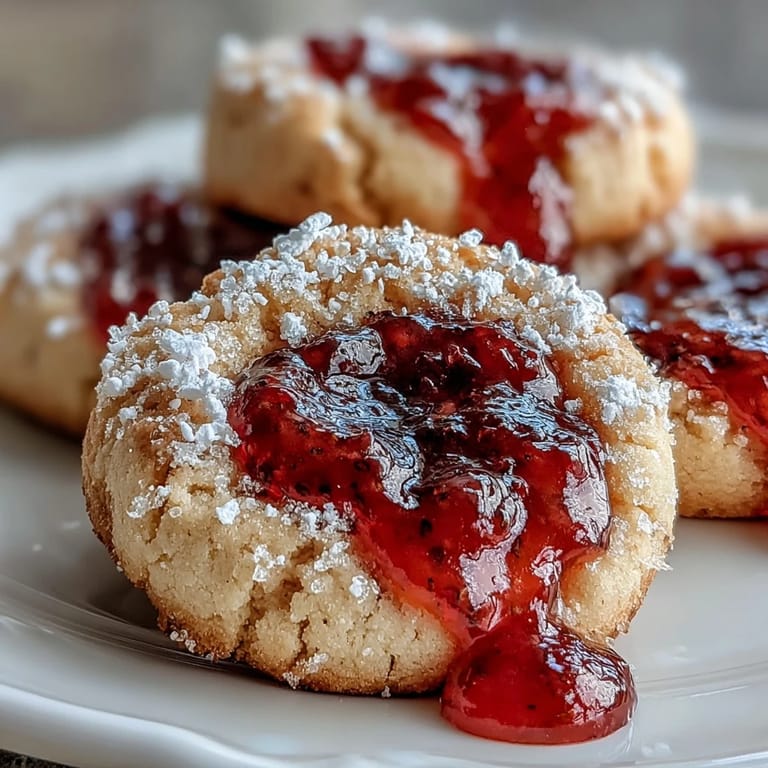
- Once completely cooled, dust lightly with powdered sugar for a finish that catches the light.
 Save to Pinterest
 At that picnic, I watched a little girl carefully eat around the jam center first, then finish the cookie—and her mom laughed, remembering doing the same thing as a kid. That moment reminded me that recipes aren't just instructions; they're vessels for small joys and family rituals that pass down without anyone making a formal announcement about it.
Flavor Swaps That Work Beautifully
While strawberry jam is the classic, I've experimented with variations depending on mood and season. Raspberry jam brings a tartness that plays wonderfully against the butter, and apricot creates something almost nostalgic. Last summer I tried cherry jam on a whim and discovered it's become my favorite—something about that deep color and slightly tart finish feels more sophisticated without being fussy. The dough never changes; only the filling does, which means once you master this base, you have an endless palette to explore.
Making Them Picnic-Proof
The real genius of these cookies is how portable they are. They hold up beautifully in containers, don't require refrigeration, and won't leave your hands sticky like some treats do. I learned to layer them between parchment squares in a shallow tin, which keeps them from shifting and rubbing against each other during transport. They're sturdy enough to survive a 20-minute car ride but tender enough that they melt slightly on your tongue—the best of both worlds.
The Small Details That Matter Most
Years of making these has taught me that shortcuts rarely pay off here. Using room-temperature butter instead of cold is non-negotiable, and measuring flour by weight if you have a scale prevents the dense-cookie catastrophe that happens when too much flour sneaks into the dough. The jam-to-dough ratio matters too; too much jam leaks out and burns on the pan, creating crispy edges on the cookie that aren't pleasant.
- If you want slightly thicker, chewier cookies, chill the shaped balls for 15 minutes before baking—this prevents them from spreading too thin.
- Save any leftover dough scraps, chill them, and re-roll them into balls; they bake perfectly fine and reduce waste.
- These keep in an airtight container for up to 5 days, though they rarely last that long in my house.
 Save to Pinterest
 Every time I make these, I'm struck by how something so simple can bring people together. They're the kind of recipe that asks for just enough attention to feel intentional, but not so much that you're stressed—which feels exactly right for sharing.
Recipe FAQ
- → What is the best jam to use for these cookies?
Seedless strawberry jam works best to ensure a smooth filling that doesn't spill during baking. Raspberry or apricot jams are tasty alternatives.
- → Can I prepare the dough in advance?
Yes, chilling the dough for about 15 minutes before shaping helps the cookies hold their shape and makes handling easier.
- → How do I know when the cookies are baked properly?
Bake until the edges are lightly golden, which usually takes 13–15 minutes at 350°F (175°C). This ensures a tender crumb without overbaking.
- → What can I use to fill the thumbprint indentation?
A small spoon or your thumb can create the indentation. Fill it with roughly half a teaspoon of jam for balanced sweetness.
- → Are these cookies suitable for any dietary preferences?
These cookies are vegetarian but contain dairy and gluten, so they are not suitable for dairy-free or gluten-free diets.
- → How should I store the cookies to keep them fresh?
Store in an airtight container at room temperature for up to a week. Avoid moisture to maintain crisp edges and soft centers.