 Save to Pinterest
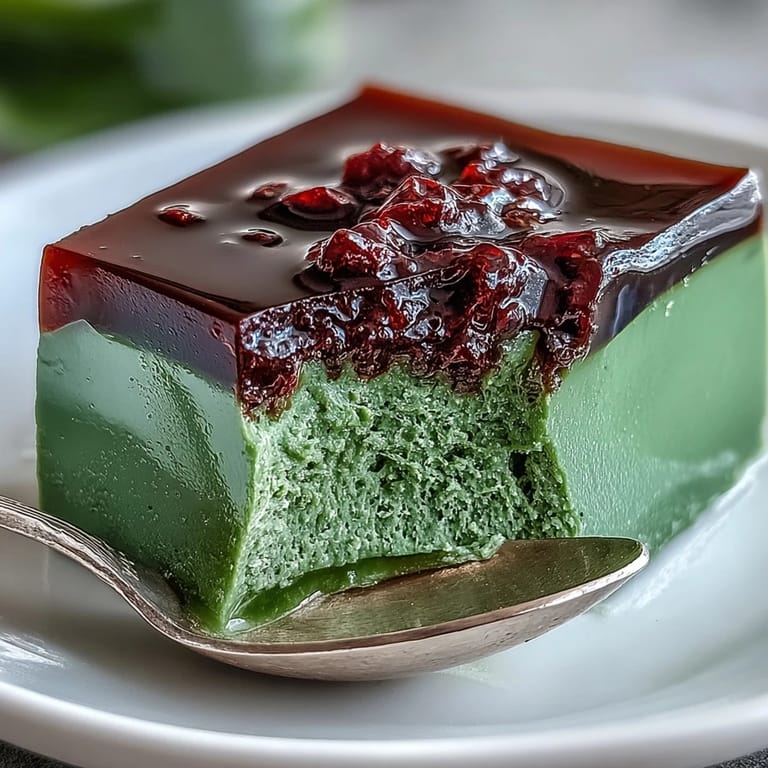
 The soft, earthy aroma of red beans simmering on my stovetop always makes me pause and breathe a little deeper. The first time I layered up this yokan, I had no idea the vivid green of matcha would set so elegantly against the deep burgundy bean jelly. I didn’t grow up with these flavors, but working this recipe into my afternoon brought a quiet satisfaction. Preparing yokan is a mindful process, and as each layer set and the kitchen cooled, it felt as if I’d pressed pause on a busy day. There is a gentle pride watching each slice reveal such a pretty, marbled cross-section.
I once made yokan on a rainy evening, just as my friend dropped by to return a borrowed book — she ended up sipping tea and trying her first slice while the city dampened outside. We laughed at my kitchen, counters crowded with mismatched pans, and I remember her surprise that something so fanciful was, at its core, simply beans and tea. Those quiet, shared desserts stick with me more than brightly lit parties ever do.
Ingredients
- Sweetened red bean paste (anko – koshian preferred): The smooth variety gives the jelly its silken, almost creamy finish; whisk well to avoid hidden lumps.
- Agar-agar powder: This seaweed-based thickener sets clear and clean; dissolve it fully to avoid grainy bits.
- Water: Use filtered water to keep flavors pure and the jelly free of any unwanted mineral taste.
- Sugar: Just enough to bring balance to the earthy matcha — adjust a little for your own sweet tooth.
- Matcha green tea powder: Sift it finely right before adding for vibrant color and a smooth, brisk note.
Tired of Takeout? 🥡
Get 10 meals you can make faster than delivery arrives. Seriously.
One email. No spam. Unsubscribe anytime.
Instructions
- Begin the Red Bean Jelly:
- Pour the water and agar-agar into your saucepan, and stir gently as the powder dissolves, letting the soft sound of bubbling rise up. Once dissolved, let the mixture simmer for a minute or two until it turns almost clear and thickens slightly.
- Smooth in the Anko:
- Off the heat, whisk in that sweet red bean paste patiently until the mix is completely smooth — keep going until you see no streaks at all.
- Mold and Set:
- Pour this plum-hued jelly into your rectangular mold, smoothing the top and flicking away any bubbles, then let it begin to set as you prepare the next layer.
- Make the Matcha Jelly:
- Clean your saucepan and repeat with water and agar-agar, enjoying the transformation as the powder disappears into a silkier liquid.
- Finish the Matcha Layer:
- Lower the heat, add in the sugar, then briskly whisk in the sifted matcha until no lumps remain and the whole thing glows green.
- Assemble and Chill:
- Cool the matcha mixture until just warm to the touch, then pour it gently over your set red bean layer and return to chill until completely firm.
- Slice and Serve:
- Turn out the jelly, slice it into neat bars with a damp knife, and serve it up chilled — each piece showing off those distinct, elegant layers.
 Save to Pinterest
 The first time my sister tried this, she giggled at how wobbly the jelly was, then took a second piece — that's when I knew it was more than a just pretty dessert, it was something we’d make together again.
How to Get a Smooth, Seamless Layer
Letting the red bean base cool long enough is key — too warm, and it’ll melt when you pour on the matcha, but too cold, and the layers may not bond. I watch for a gentle ‘give’ when I touch the surface, a little like the top of a cheesecake before you chill it overnight. This touch-test reduces guesswork, especially the first few times.
Choosing the Right Kind of Matcha
Not all matcha is the same; brighter, ceremonial-grade matcha brings a fresh grassy note (and a more vivid green), while culinary-grade will be slightly more mellow. If you want a dessert with both color and flavor impact, don’t skimp — and always sift it just before whisking, so you don’t find any stubborn green streaks left behind. When in doubt, taste a pinch before using it — if it’s pleasant straight, it’ll shine in your yokan.
Making Ahead and Storing
This yokan keeps beautifully for a few days, making it a great do-ahead treat for gatherings or long afternoons. Cover tightly in the fridge so it doesn’t take on fridge flavors, and slice just before serving for the neatest appearance.
- Use a knife dipped in hot water and wiped dry for the cleanest slices.
- If you want smaller servings, cut into bite-sized cubes for sharing.
- Don’t forget to label if you store next to strong-smelling foods!
 Save to Pinterest
 I hope each piece brings you a splash of color and a little bit of calm, just as it did for me. Sometimes, the simplest desserts carry the most joyful surprises.
Recipe FAQ
- → Can I use a different type of red bean paste?
Koshian (smooth) gives the cleanest texture; if you use tsubuan (chunky), warm and blend or pass through a sieve for a smoother finish. Adjust agar slightly if the paste is wetter or drier.
- → How do I prevent matcha from clumping?
Sift matcha before adding, dissolve sugar into the hot agar liquid first, then whisk the matcha in with a fine whisk or small balloon whisk until fully dispersed and lump-free.
- → How can I change the firmness of the yokan?
Increase agar by about 0.5–1 g for a firmer set, or decrease slightly for a softer, more yielding texture. Remember agar firms as it cools, so make small adjustments and note results.
- → What are the best chilling and storage practices?
Chill the assembled layers until fully set, at least an hour. Store in an airtight container in the refrigerator for 3–4 days; serve well chilled for the best texture and flavor.
- → What mold and slicing tips give the cleanest presentation?
A rectangular mold or loaf pan creates neat bars. Dip a sharp knife in hot water, wipe dry between cuts, and slice in steady strokes for glossy, even pieces.
- → How should I balance sweetness with matcha’s bitterness?
Taste the matcha layer before chilling and adjust sugar to soften bitterness. Using a high-quality culinary or ceremonial matcha gives brighter color and a smoother flavor profile.