 Save to Pinterest
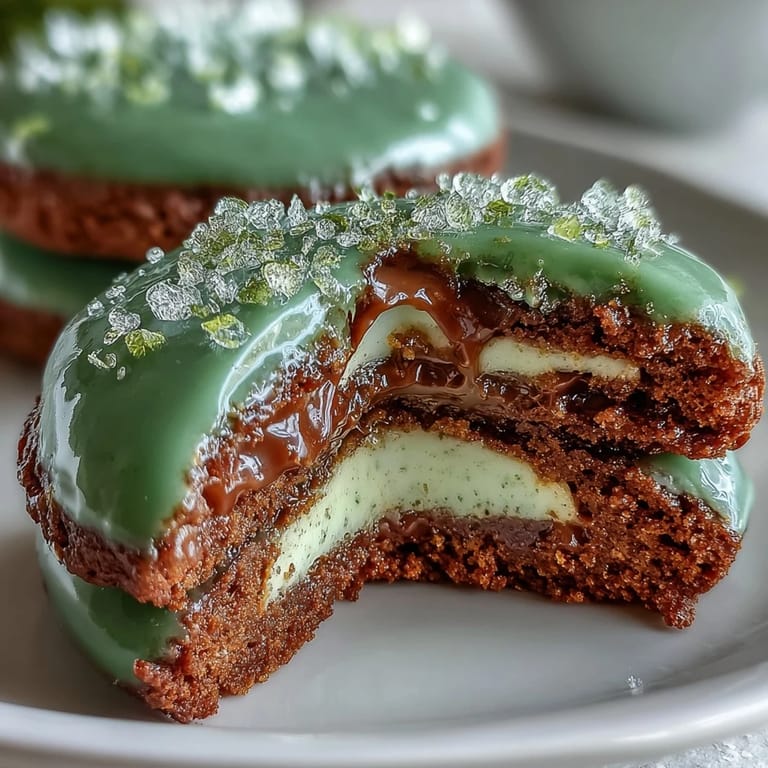
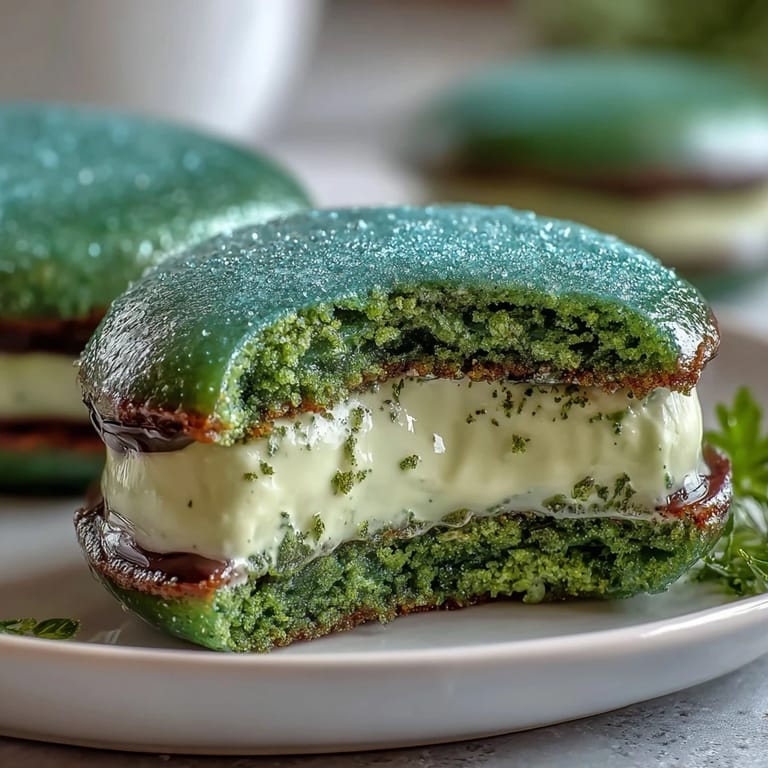
 My neighbor showed up with a batch of these last March, and I watched her kids press their noses against the kitchen window while the cookies baked, their faces already painted with anticipation. There's something about bright green cookies that makes people forget they're supposed to act their age. She handed me one still warm from the oven, and the buttery softness combined with that creamy frosting middle made me understand why she'd spent her morning covered in sparkly sugar. That afternoon, I made my own batch just to experience that magic again, and somehow they disappeared faster than I could plate them.
I brought these to my daughter's school St. Patrick's Day party, and watching the other kids trade their regular cookies to get a green sandwich cookie made me realize these aren't just dessert—they're basically edible currency in elementary school. One kid asked if they were magic because they were green, and honestly, the way her face lit up when she bit into that frosting layer? Pretty close.
Ingredients
- All-purpose flour (2 1/2 cups): This is your foundation, and measuring by weight keeps them consistent every single time you make them.
- Baking powder (1/2 tsp): Just enough lift to keep these cookies tender without making them cake-like, which is the sweet spot.
- Salt (1/4 tsp): Brings out the vanilla and butter flavors in a way you won't notice until it's missing.
- Unsalted butter, softened (1 cup): The creamy base that makes these melt in your mouth—cold butter won't cream properly, so let it sit out for at least 30 minutes.
- Granulated sugar (1 cup): Creates that slightly crispy edge while the center stays soft and chewy.
- Large egg (1): Binds everything together and adds richness that makes them feel indulgent.
- Pure vanilla extract (2 tsp): Use real vanilla, not imitation—you'll taste the difference in every bite.
- Almond extract (1/2 tsp, optional): This tiny addition deepens the flavor and makes people ask what your secret ingredient is.
- Green gel food coloring: Gel stays concentrated without watering down your dough like liquid coloring does, and you get that vivid St. Patrick's Day green that photographs beautifully.
- Green sparkling sugar (1/2 cup): This coating is what makes them look festive and feel special the moment you see them.
- Unsalted butter for frosting (1/2 cup): Softened the same way as the cookie butter so it blends smoothly with the powdered sugar.
- Powdered sugar, sifted (1 3/4 cups): Sifting removes lumps and gives you that silky frosting texture without overbeating.
- Milk (1 1/2 tbsp): Just enough to loosen the frosting without making it runny—add it slowly and stop when it feels right.
- Vanilla extract for frosting (1 tsp): Reinforces that vanilla flavor throughout the entire cookie sandwich.
- Pinch of salt for frosting: Another small salt addition that balances the sweetness and makes the frosting taste more sophisticated.
Tired of Takeout? 🥡
Get 10 meals you can make faster than delivery arrives. Seriously.
One email. No spam. Unsubscribe anytime.
Instructions
- Heat your oven and prep your station:
- Preheat to 350°F and line two baking sheets with parchment paper—this prevents sticking and lets them bake evenly on the bottom. Having everything ready means you can focus on the fun part, not scrambling for supplies.
- Mix your dry team:
- Whisk flour, baking powder, and salt in a medium bowl until they're evenly combined. This step ensures the baking powder distributes throughout so every cookie rises the same way.
- Cream butter and sugar into fluffy clouds:
- Beat them together for 2 to 3 minutes until the mixture turns pale and light—you'll see it transform from dense to airy, and that's exactly what you want. This aeration is what keeps these cookies tender.
- Add your wet ingredients and color:
- Beat in the egg and both extracts until smooth, then add your green gel food coloring a little at a time until you reach that festive green shade you're imagining. The batter will be vibrant and ready to celebrate.
- Bring it all together gently:
- Gradually mix in your dry ingredients just until the dough comes together—overmixing toughens the cookies, so stop as soon as you don't see any white streaks. The dough should feel soft and slightly sticky.
- Coat and place your cookie balls:
- Scoop tablespoon-sized portions, roll them gently in your hands to form balls, then coat each one in green sparkling sugar before placing them 2 inches apart on your prepared baking sheets. The coating sticks better to the dough than it would after baking.
- Gentle flatten and bake:
- Press each ball down slightly with your palm—they'll look like little emeralds sitting on the sheet. Bake for 9 to 11 minutes until the edges are set but the centers still look slightly underdone; this is the secret to keeping them soft.
- Cool completely before frosting:
- Let them rest on a wire rack until they're room temperature, which takes about 20 minutes. Warm cookies plus frosting equals a melting mess, so patience here pays off.
- Make your frosting silky and smooth:
- Beat softened butter until creamy, add your sifted powdered sugar slowly, then milk, vanilla, and salt, beating until you reach fluffy cloud texture. Taste it and adjust vanilla if needed—it should be spreadable but not runny.
- Assemble your sandwich cookies with style:
- Spread or pipe a generous frosting layer on the flat side of half your cookies, then top with the remaining cookies to create sandwiches. If you want extra pizzazz, roll the frosting-exposed sides in more green sparkling sugar.
 Save to Pinterest
 There's a moment when you pull these out of the oven and the whole kitchen smells like butter and vanilla and possibility, and you realize you've made something that's more than just a treat—it's a tiny edible celebration. My kids now request these every March, and I've started making extra because apparently I can't say no to the way their eyes light up when they see that sparkling green.
The Secret to Perfectly Tender Cookies
The magic happens in the baking time itself—pull them out when the edges look set but the centers still have a tiny bit of give when you gently press them. They'll continue cooking on the hot pan for another minute, and then when they cool completely, they transform into these perfect pockets of soft sweetness. I learned this the hard way by overbaking my first batch until they turned into crunchy discs that nobody wanted to sandwich.
Frosting Texture Matters More Than You'd Think
The frosting is what holds these sandwiches together, and it needs to be whipped light and fluffy rather than thin and runny. If it's too soft, it will squish out the sides; if it's too stiff, you'll have a hard time spreading it evenly. I usually do a test dollop on one cookie before committing to frosting the whole batch—it only takes a few seconds and saves potential disappointment.
Storage, Variations, and Last-Minute Saves
These cookies stay fresh in an airtight container at room temperature for up to three days, which means you can actually make them ahead for a party without panic. The frosting keeps them moist, so they don't dry out the way unfilled cookies might. Here's what else makes these adaptable and fun to revisit:
- Swap almond extract for peppermint extract if you want that holiday-festive twist, or skip it entirely if you prefer pure vanilla simplicity.
- The sparkling sugar coating can be applied before or after assembly—before creates a more cohesive sparkle, after gives you more control over which parts shine.
- If you mess up the frosting and it's too thick, a teaspoon more milk usually saves it; too thin means you need a tablespoon more powdered sugar beaten in gently.
 Save to Pinterest
 These cookies aren't just St. Patrick's Day decor—they're the kind of thing that becomes a tradition once you make them the first time. Bake a batch this week and watch what happens when you share them.
Recipe FAQ
- → What gives the cookies their green color?
Gel food coloring is used to achieve a vibrant green hue without altering dough consistency, ensuring bright and festive cookies.
- → How do I get the sparkling sugar to stick to the cookies?
Roll the dough balls in sparkling sugar before flattening and baking, which helps create a shimmering outer layer once baked.
- → Can I substitute the vanilla frosting with other flavors?
Yes, you can replace vanilla frosting with flavors like peppermint or almond to suit your taste or enhance the festive feel.
- → What is the best way to store these cookies?
Store in an airtight container at room temperature for up to three days to maintain freshness and softness.
- → Are these cookies difficult to prepare?
They are rated easy, requiring common baking tools and straightforward steps suitable for bakers of all levels.