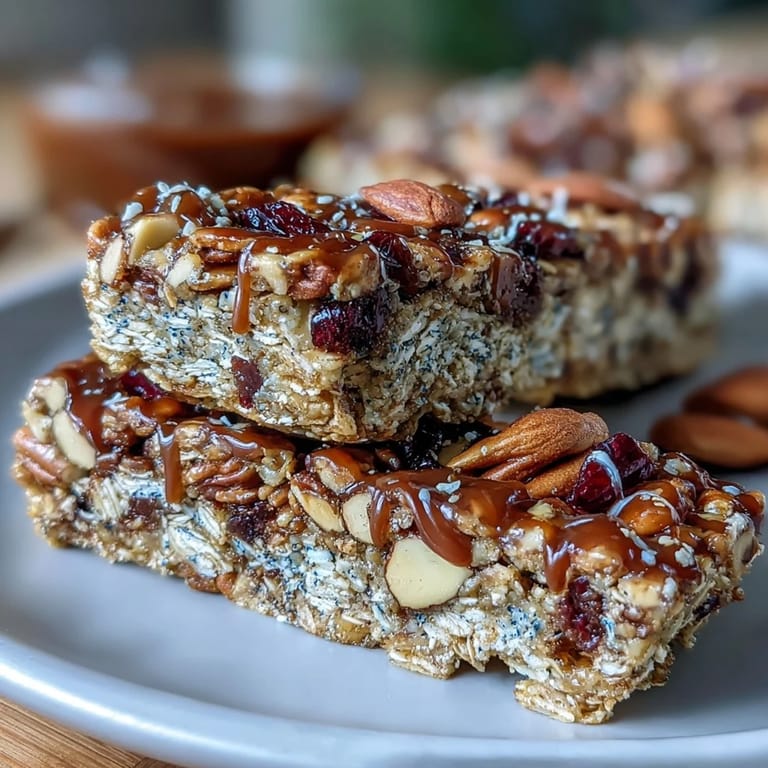
 Save to Pinterest
 Last summer, I was packing for a hiking trip and realized I'd forgotten to grab snacks from the store. With an hour to spare, I pulled together what I had in the pantry—oats, honey, peanut butter—and these bars came together so effortlessly that I've been making them ever since. There's something deeply satisfying about mixing a handful of ingredients in one bowl and having something that tastes homemade and wholesome without turning on the oven.
I brought a batch to a potluck once and watched them disappear before the main course arrived. A neighbor asked for the recipe right there on the deck, and I realized these bars had crossed from quick snack to crowd-pleaser territory, which honestly surprised me given how simple they are.
Ingredients
- Old-fashioned rolled oats (2 cups): Use the thick-cut kind, not instant—they give the bars real body and chewiness that keeps them satisfying.
- Crisp rice cereal (1 cup): This adds a subtle crunch and helps the bars hold together without any binding agents.
- Mixed nuts, chopped (1/2 cup): Almonds, walnuts, and pecans all work beautifully, and chopping them roughly means you get little surprises in every bite.
- Dried fruit (1/2 cup): Cranberries bring tartness, raisins add chewiness, and apricots bring natural sweetness—pick what you love or mix them.
- Shredded coconut, unsweetened (1/4 cup, optional): I skip this sometimes, but when I add it, the bars feel more like a treat.
- Salt (1/4 teaspoon): Just a pinch to make everything taste more like itself, never obvious but always necessary.
- Honey or maple syrup (1/2 cup): Honey gives a mellow sweetness while maple syrup adds deeper notes—both work equally well.
- Peanut or almond butter (1/3 cup): The creamy kind binds everything and adds richness without heaviness.
- Vanilla extract (1 teaspoon): A small amount that rounds out the flavor profile beautifully.
- Mini chocolate chips (1/4 cup, optional): These are the secret indulgence that makes them feel like a real treat.
- Chia seeds or flaxseed meal (1 tablespoon, optional): Add these for extra nutrition and a subtle nuttiness.
Tired of Takeout? 🥡
Get 10 meals you can make faster than delivery arrives. Seriously.
One email. No spam. Unsubscribe anytime.
Instructions
- Prepare your pan:
- Line an 8-inch square baking pan with parchment paper and let it hang over the edges—this makes lifting the bars out later so much easier that you'll wonder why you didn't always do this.
- Combine the dry team:
- In a large bowl, toss together the oats, rice cereal, nuts, dried fruit, coconut if using, and salt until everything is evenly distributed and looks like golden scattered treasure.
- Warm the sticky binders:
- In a small saucepan over low heat, stir the honey and peanut butter together until they're melted and silky smooth, then remove from heat and stir in the vanilla. The whole thing takes just a few minutes and smells absolutely divine.
- Bring wet and dry together:
- Pour the warm mixture over the dry ingredients and mix thoroughly until every oat and nut is glossy and coated, which takes more elbow grease than you'd think but is oddly meditative.
- Smart chocolate chip timing:
- If you're adding chocolate chips, let the mixture cool for a couple of minutes first so they don't melt into puddles, then fold them in gently. This is a small move that makes a real difference.
- Press into the pan:
- Transfer everything to your prepared pan and press down firmly and evenly using a spatula or the back of a measuring cup, making sure there are no air pockets hiding underneath.
- Top with flair:
- Sprinkle extra chocolate chips or nuts on top if you want, pressing them down gently so they stick around during chilling and slicing.
- Chill until set:
- Pop the whole pan into the refrigerator for at least an hour—the mixture will firm up and become perfectly sliceable, which is when the magic happens.
- Cut and store:
- Lift the whole slab out using the parchment overhang and slice into 12 bars with a sharp knife, wiping the blade clean between cuts for neat edges. Store them in an airtight container in the fridge for up to a week, though they rarely last that long in my house.
 Save to Pinterest
 My partner grabbed one of these while unpacking from a work trip, took a bite, and said they were better than anything they'd bought during their travels. That's when I knew these weren't just a practical solution anymore—they'd become something I was genuinely proud to share.
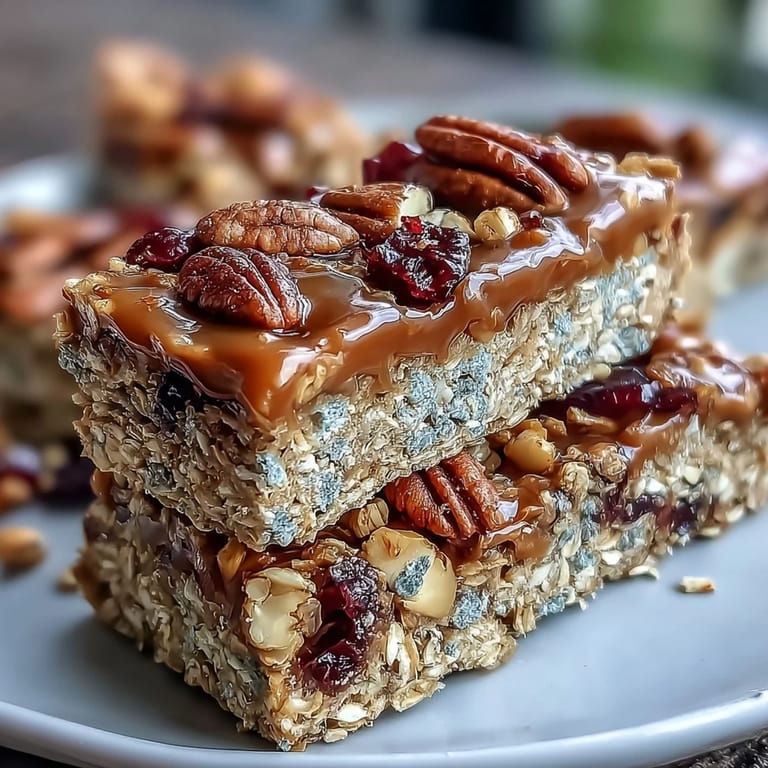
Texture Secrets That Matter
The combination of old-fashioned oats and crisp rice cereal creates a texture that's tender but still has structure. I learned this by accident when I once substituted quick oats and ended up with bars that were mushy instead of chewy. The rice cereal keeps them from being dense, and the mix of nuts and dried fruit means every bite has something different to experience, so you never feel like you're eating the same thing twice.
Flavor Building and Balance
The sweetness comes from the honey or maple syrup, but the magic happens because of the salt and vanilla, which amplify all the other flavors without announcing themselves. I've noticed that when I leave out the salt, the bars taste flat, and when I use extra vanilla, they suddenly feel more indulgent. It's a lesson in how small adjustments shift the entire experience of eating something, and it keeps me thinking about balance every time I cook.
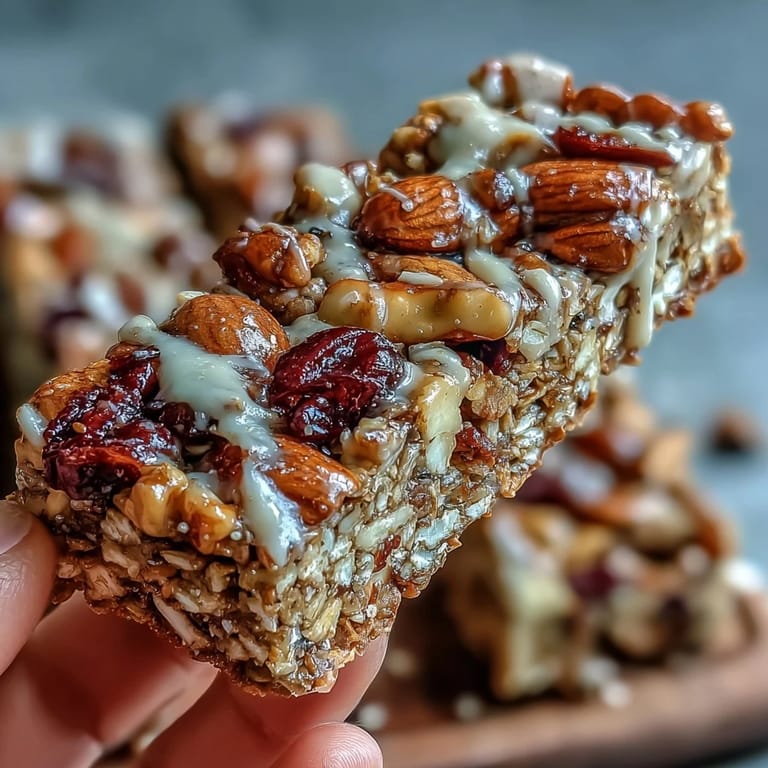
Customization and Seasonal Shifts
These bars welcome improvisation like few recipes do. I've swapped in different nuts depending on what's on sale, used different dried fruits based on what looks good at the market, and even experimented with adding spices like cinnamon or cardamom for deeper complexity. The beauty is that you can make them nut-free with sunflower seed butter, vegan with maple syrup and dairy-free chocolate, or completely plain if you prefer simplicity.
- Try adding a quarter teaspoon of cinnamon or cardamom for warmth and depth if you want to experiment beyond the basic recipe.
- Sunflower seed butter makes an excellent nut-free substitute if you're dealing with allergies or just want something different.
- Make these ahead and freeze extras in an airtight container for up to three weeks so you always have a snack ready to grab.
 Save to Pinterest
 These bars have become the thing I make when I want something homemade but don't have time for fuss, which turns out to be often. They remind me that the best recipes are the ones that fit into real life.
Recipe FAQ
- → How do I keep the bars from falling apart?
Make sure to press the mixture firmly into the pan and chill for at least one hour to allow it to set properly.
- → Can I substitute peanut butter for other nut butters?
Yes, almond butter or sunflower seed butter work well, especially for nut-free options.
- → Are these bars gluten-free?
Use certified gluten-free oats and rice cereal to ensure the bars remain gluten-free.
- → How can I add extra flavor to these bars?
Try including spices like cinnamon or cardamom to enhance the taste.
- → Can I add chocolate chips without melting?
Allow the mixture to cool for a few minutes before stirring in chocolate chips to prevent melting.