 Save to Pinterest
 My sister called on a Tuesday afternoon asking what to bring to dinner, and I blurted out chocolate pudding without thinking twice. When she arrived with store-bought cups, I felt that tiny pang of guilt—the kind that sends you to the kitchen with determination. Two hours later, when everyone leaned back after dessert with that satisfied sigh, I realized why homemade pudding matters: it's not fancy or complicated, but it tastes like someone actually cared enough to make it from scratch.
Years ago, I served this at a dinner party where one guest mentioned they hadn't had real chocolate pudding since childhood. Watching their face when they tasted it—that split second of genuine surprise—reminded me that the simplest things often mean the most.
Ingredients
- Whole milk: Use full-fat because it creates that luxurious mouthfeel; skim just won't deliver the richness you're after.
- Heavy cream: This is what elevates it from pudding to something truly silky and decadent.
- Unsalted butter: A small amount that melts into the chocolate, adding depth and glossiness to every spoonful.
- Granulated sugar: Keep it standard white sugar; the straightforward sweetness lets the chocolate shine.
- Unsweetened cocoa powder: Don't grab the sweetened kind by accident—this is your pure chocolate voice.
- Cornstarch: The secret to that perfect set without any graininess or overly thick texture.
- Salt: Just a whisper to make the chocolate flavor pop and taste more sophisticated.
- Dark chocolate (60–70% cocoa): Chop it finely so it melts smoothly; 70% gives you that deep, grown-up chocolate taste without bitterness.
- Vanilla extract: The finishing note that makes people wonder what makes this taste so much better than they expected.
Tired of Takeout? 🥡
Get 10 meals you can make faster than delivery arrives. Seriously.
One email. No spam. Unsubscribe anytime.
Instructions
- Mix your dry team:
- Whisk together the sugar, cocoa powder, cornstarch, and salt in a medium saucepan. This combines everything evenly before the milk hits, preventing those stubborn little lumps that ruin the smooth texture.
- Bring in the dairy:
- Gradually pour in the milk and cream while whisking constantly, making sure every trace of dry ingredient dissolves. Go slowly—this is the one moment where patience actually matters.
- Apply the heat:
- Set the saucepan over medium heat and whisk continuously until you see it thicken and small bubbles form at the edges, roughly 5–7 minutes. You'll feel the mixture change under your whisk, becoming glossy and heavy.
- Add the chocolate moment:
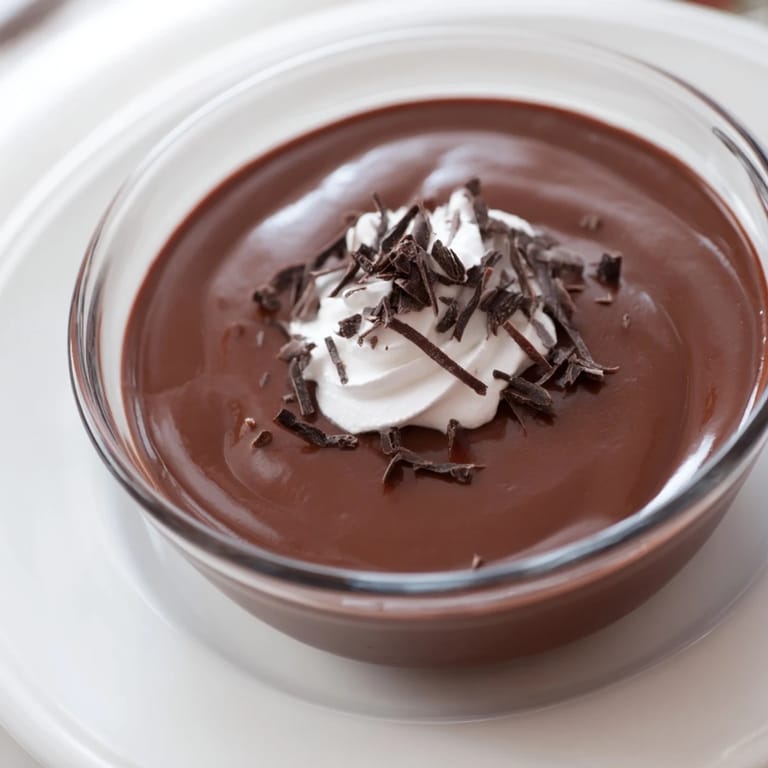
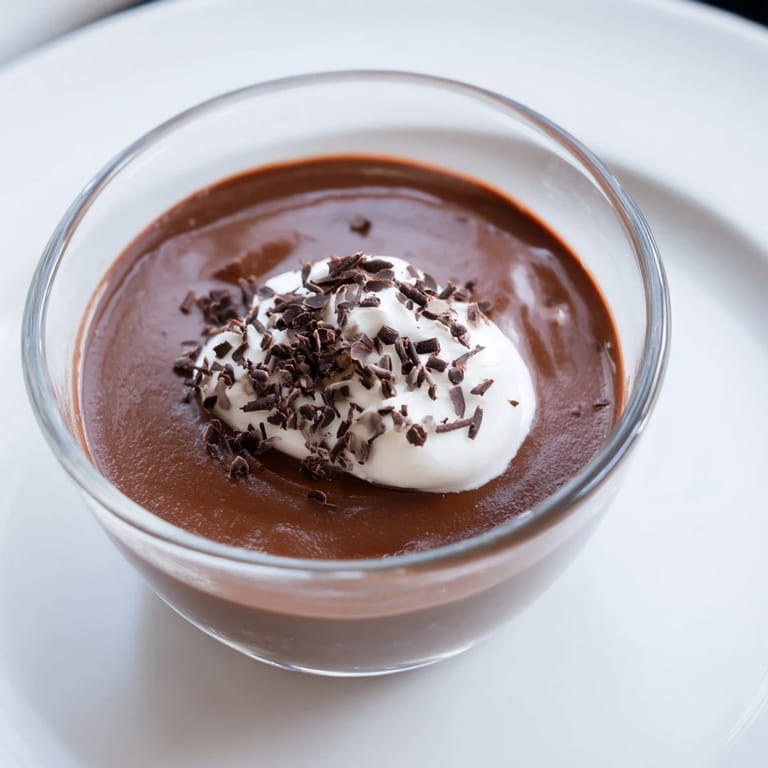
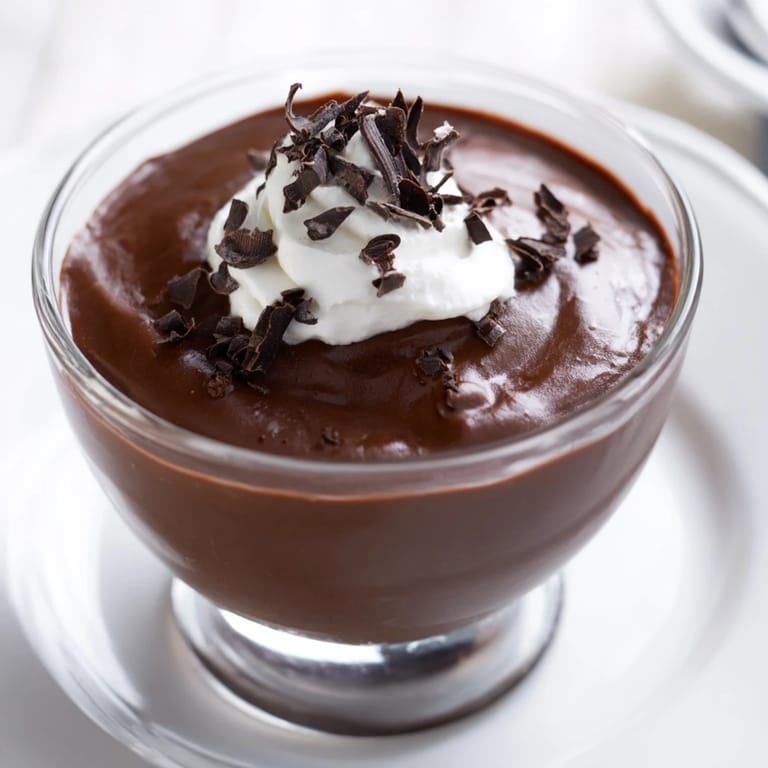
- Take it off the heat, scatter in your chopped chocolate and butter, then whisk until it's completely melted and the pudding gleams. This is where the magic happens—smooth, dark, irresistible.
- Finish with vanilla:
- Stir in the vanilla extract and taste it; you'll notice how it deepens and rounds out the chocolate flavor.
- Pour and protect:
- Divide the pudding into glasses or bowls, then press plastic wrap directly onto the surface of each one to prevent that skin from forming on top. It's a small step that makes the final texture perfect.
- Wait in the cold:
- Refrigerate for at least 2 hours until it sets into that cloud-like chill that makes it worth the time investment.
 Save to Pinterest
 I once made this for someone who swore they hated chocolate, just to see what would happen. They ate two servings. We didn't talk about it, but they asked for the recipe before leaving, and I knew I'd converted them without needing a single word.
The Beauty of Simple Elegance
There's something quietly powerful about a dessert that tastes expensive and complicated when it's actually just dairy, chocolate, and a few pantry staples combined the right way. This pudding proves that you don't need dozens of ingredients or advanced techniques to feel like you've treated yourself well. Every element serves a purpose, nothing is wasted, and the result feels like a small gift you give yourself or someone else.
Why This Works Better Than the Box
Instant pudding mixes sit in your cupboard promising convenience, but they always taste like instructions and artificial thickeners. Making it from scratch takes barely longer and costs less, plus you control exactly how rich and chocolatey it becomes. Once you taste the difference—the way real chocolate coats your tongue instead of feeling waxy—you'll understand why it's worth the ten minutes of whisking.
When to Make It and How to Serve
This pudding is your answer when you need something elegant but don't want to stress. Make it in the morning and it's ready by dinner; keep it covered and it holds perfectly for a day. Serve it on its own for purity, or top with whipped cream if you're feeling generous, chocolate shavings for visual drama, or fresh berries to cut the richness with brightness.
- A glass of Port or robust red wine turns this into a proper finish to a grown-up meal.
- If you're feeding someone dairy-free, swap in coconut or oat milk, dairy-free butter, and quality vegan chocolate—it works seamlessly.
- Store any leftovers covered in the fridge, and it stays beautiful for about two days.
 Save to Pinterest
 This is the pudding that reminds you why you cook: a moment of indulgence that costs almost nothing and takes almost no time, yet tastes like someone truly cared. Make it tonight.
Recipe FAQ
- → How do I achieve a smooth texture?
Whisk the mixture constantly while cooking to prevent lumps and ensure smoothness.
- → Can I make it dairy-free?
Yes, substitute milk, cream, and butter with plant-based alternatives and use dairy-free chocolate.
- → What is the best way to chill it?
Cover surface with plastic wrap before refrigerating to avoid a skin forming on top.
- → How long should it chill?
Chill for at least two hours to allow the pudding to set and develop flavor.
- → What toppings pair well?
Whipped cream, chocolate shavings, or fresh berries complement the creamy chocolate perfectly.
- → Can I add extra flavor?
Yes, a pinch of espresso powder or a splash of liqueur like Grand Marnier enhances depth.