 Save to Pinterest
 Years ago, a friend came back from a night out raving about crispy orange chicken from this tiny spot downtown, and I became obsessed with recreating it at home. After a few batchy attempts and one kitchen mishap involving too much zest, I finally nailed the balance of sweet, tangy, and that addictive crispness that makes takeout food so hard to resist. Now this is the dish I make when I want to feel like I'm running my own restaurant, except with less stress and better leftovers.
I made this for my roommate on a random Tuesday when she'd had the worst day at work, and watching her face light up when she tasted it reminded me that sometimes the simplest gesture in the kitchen speaks louder than any words. She went back for thirds, and I knew I'd created something worth keeping in rotation.
Ingredients
- Boneless, skinless chicken thighs (600g): I learned the hard way that thighs stay juicier and more forgiving than breasts when you're coating and frying them, and the bite-sized pieces cook evenly so nothing gets overdone while you wait for the last batch.
- Eggs and cornstarch flour mixture: The combo of cornstarch and all-purpose flour gives you that crispy exterior that shatters slightly when you bite it, and the egg acts as the glue that makes everything stick together.
- Fresh orange juice and zest (about 2 oranges): This is where the magic lives—bottled juice tastes flat and one-dimensional compared to fresh, and the zest adds bright little bursts of flavor that make people ask what your secret is.
- Soy sauce, sugar, and rice vinegar: These three create the backbone of the sauce, balancing umami, sweetness, and acidity in a way that feels almost impossible to mess up once you understand the proportions.
- Hoisin sauce: Just a tablespoon adds depth and a subtle sweetness that you can't quite put your finger on, which is exactly what you want.
- Garlic, ginger, and red pepper flakes: The garlic and ginger warm up in the sauce and fill your kitchen with this incredible smell, while the red pepper flakes lurk quietly in the background for anyone brave enough to taste them.
- Cornstarch slurry: This thickens the sauce to a glossy coat that clings to every piece of chicken instead of pooling at the bottom of the dish.
Tired of Takeout? 🥡
Get 10 meals you can make faster than delivery arrives. Seriously.
One email. No spam. Unsubscribe anytime.
Instructions
- Set up your dredging station:
- Whisk eggs in one bowl and mix your cornstarch, flour, salt, and pepper in another—this assembly line approach keeps you from getting overwhelmed, and your hands stay cleaner than you'd think.
- Coat the chicken evenly:
- Dip each piece into egg, then roll it in the flour mixture with your fingertips, making sure every side gets coated. You'll feel the coating stick to the chicken as it gets tacky, and that's how you know you've done it right.
- Heat your oil to the right temperature:
- Get it to about 175°C (350°F)—a thermometer makes this foolproof, but if you don't have one, drop a tiny piece of chicken in and it should sizzle immediately and float to the surface within a few seconds. Too cool and you'll have soggy, greasy chicken; too hot and it browns before the inside cooks.
- Fry the chicken in batches:
- Work in batches so you don't crowd the pan and drop the temperature—crowding is the enemy of crispiness. Each batch takes about 4 to 5 minutes, turning occasionally, until it's golden and makes a hollow sound when you tap it with a spoon.
- Build the sauce while the chicken drains:
- Combine orange juice, zest, soy sauce, sugar, rice vinegar, hoisin, garlic, ginger, and red pepper flakes in a saucepan and let it come to a simmer. The smell alone will make you excited for what's coming next.
- Thicken with the cornstarch slurry:
- Stir it in slowly and watch the sauce transform from thin and glossy to thick and clingy in about 1 to 2 minutes—this is such a satisfying moment in the kitchen.
- Toss the chicken in sauce:
- Add your crispy chicken to the sauce and toss gently for about 2 minutes so every piece gets coated without breaking apart. Taste it here and adjust salt or sugar if needed—this is your moment to make it exactly right.
- Plate and garnish:
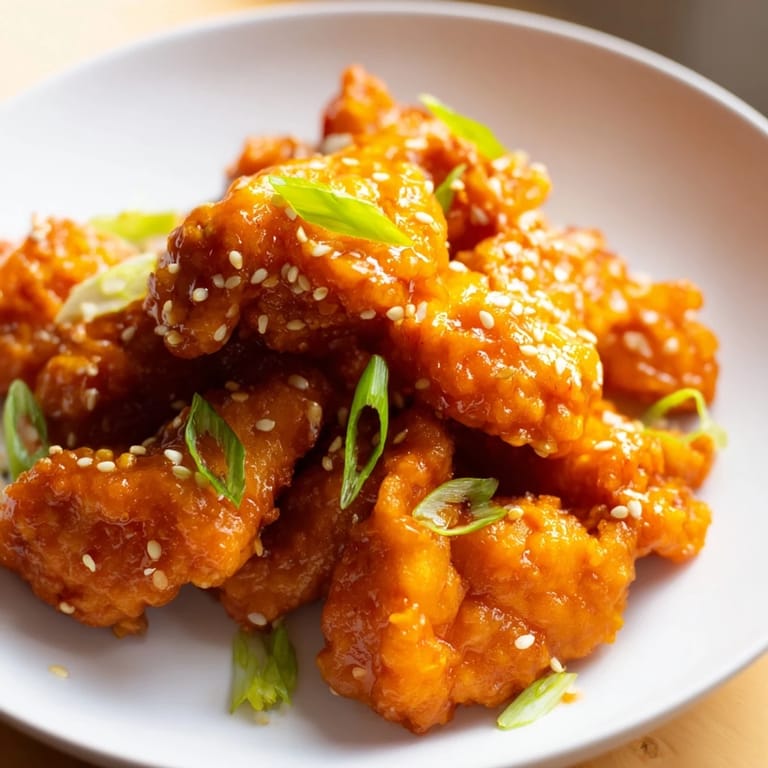
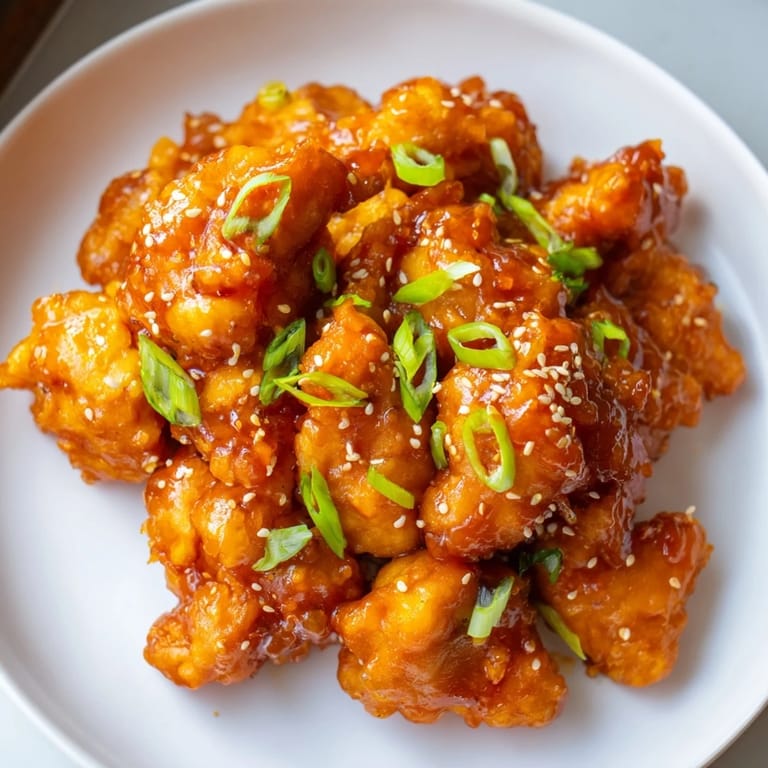
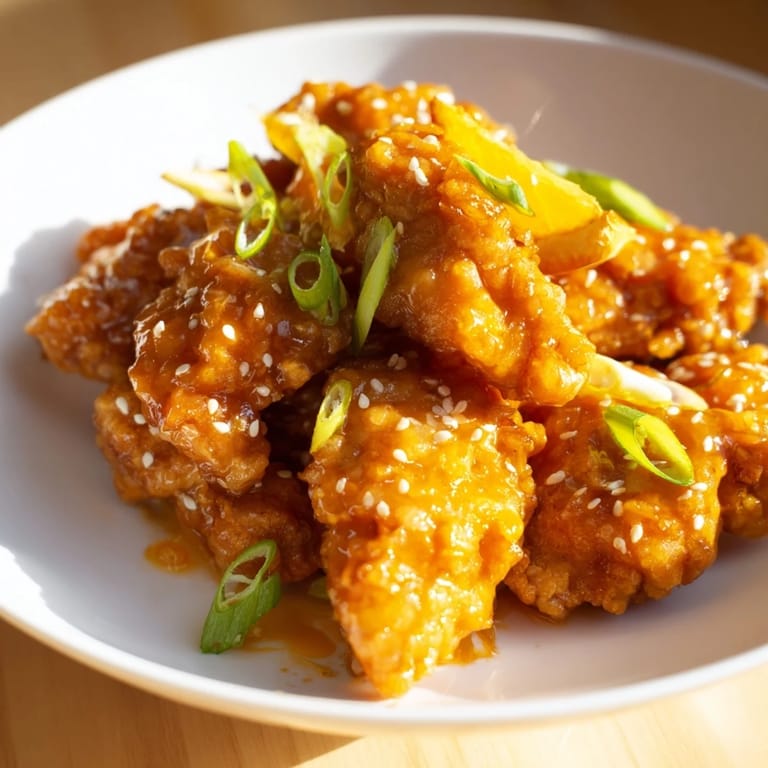
- Transfer to a serving platter and scatter fresh sliced spring onions and toasted sesame seeds on top for color, texture, and that last little hint of toasted sesame flavor.
 Save to Pinterest
 One afternoon, my partner walked in while the chicken was frying and got hit with this cloud of warm, savory air that had him hovering in the kitchen until the dish was ready. He said it smelled like the best decision I'd made all week, and suddenly it wasn't just dinner anymore—it was a moment we could both look forward to.
Why This Beats Takeout
Once you taste orange chicken made with fresh juice and zest, the delivery version starts to feel too sugary and artificial by comparison. The chicken stays crispy in your mouth instead of turning chewy after five minutes, and you control every single flavor—less sugar if you like it less sweet, more ginger if you want that bite.
What to Serve It With
Jasmine rice is the obvious choice because it's fragrant and neutral enough to let the sauce shine, but fried rice with egg and scallions is secretly the best pairing because the textures and flavors create this perfect back and forth. Some people add steamed broccoli or bell peppers for color and freshness, which I do when I'm trying to impress someone or when I need to convince myself I'm eating vegetables alongside takeout-style food.
Lighter Versions and Shortcuts
If you want to skip the deep frying but keep the crispy texture, toss your coated chicken in a light spray of oil and bake it at 220°C (425°F) for 20 to 25 minutes instead—it's not quite the same shattering crispness, but it's closer than you'd expect. You can also prep the chicken and make the sauce hours ahead, then just fry and combine when you're ready to eat, which makes this a great dish for when you're hosting and want to minimize last-minute chaos.
- Keep the oil between 170°C and 180°C for the crispiest results without burning.
- If you don't have a thermometer, test the oil temperature with a wooden chopstick—bubbles should stream from it immediately when it's ready.
- The sauce can be made a day ahead and reheated gently while you fry the chicken.
 Save to Pinterest
 This dish has become my answer to almost any dinner question because it feels fancy enough for guests but familiar enough for a regular Tuesday. There's something about homemade orange chicken that makes people feel cared for.
Recipe FAQ
- → How do I get the chicken extra crispy?
Coat the chicken pieces thoroughly with the flour and cornstarch mix, then fry in hot oil until golden brown. Avoid overcrowding the pan for even crispiness.
- → Can I make the orange sauce spicier?
Yes, adding crushed red pepper flakes to the sauce provides a mild heat that complements the sweetness and tanginess.
- → What can I serve with this dish?
Steamed jasmine rice or fried rice pairs wonderfully, along with steamed broccoli or bell peppers for added color and nutrition.
- → Is there a healthier way to prepare the chicken?
Baking the chicken at a high temperature until crispy offers a lighter alternative to frying without losing texture.
- → How do I thicken the orange sauce properly?
Stir cornstarch mixed with water into the simmering sauce and cook until it thickens and becomes glossy, usually 1–2 minutes.