 Save to Pinterest
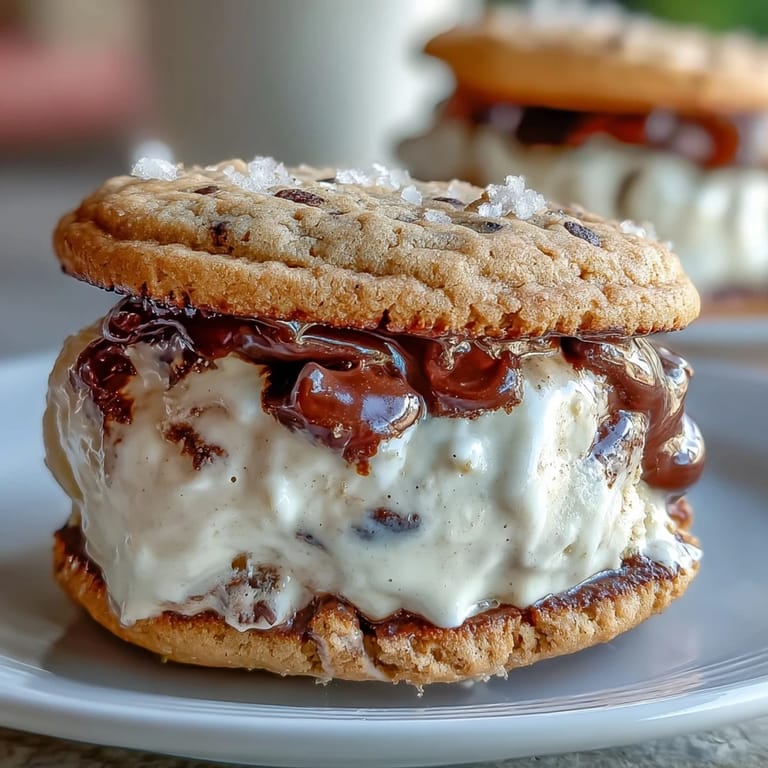
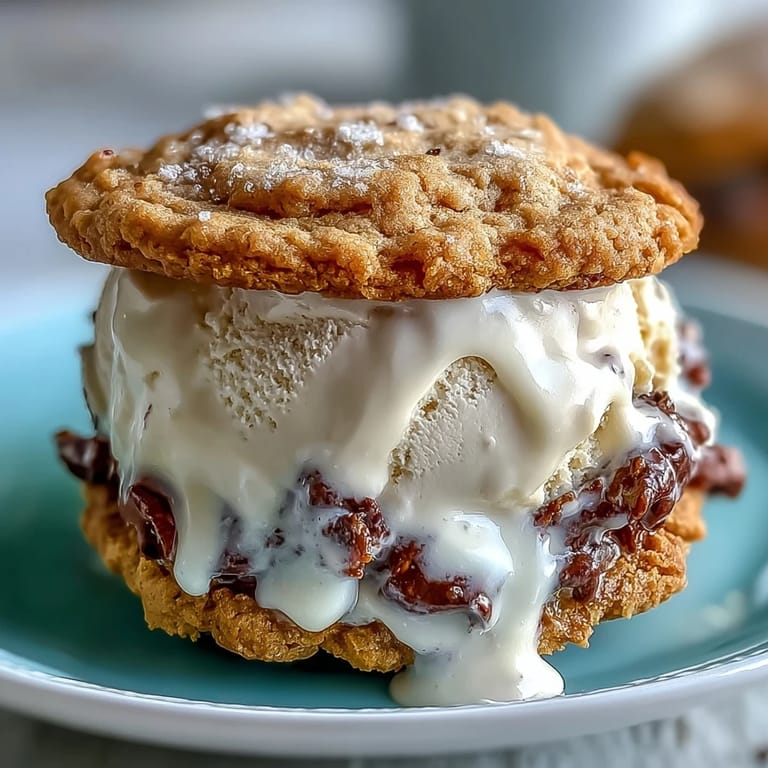
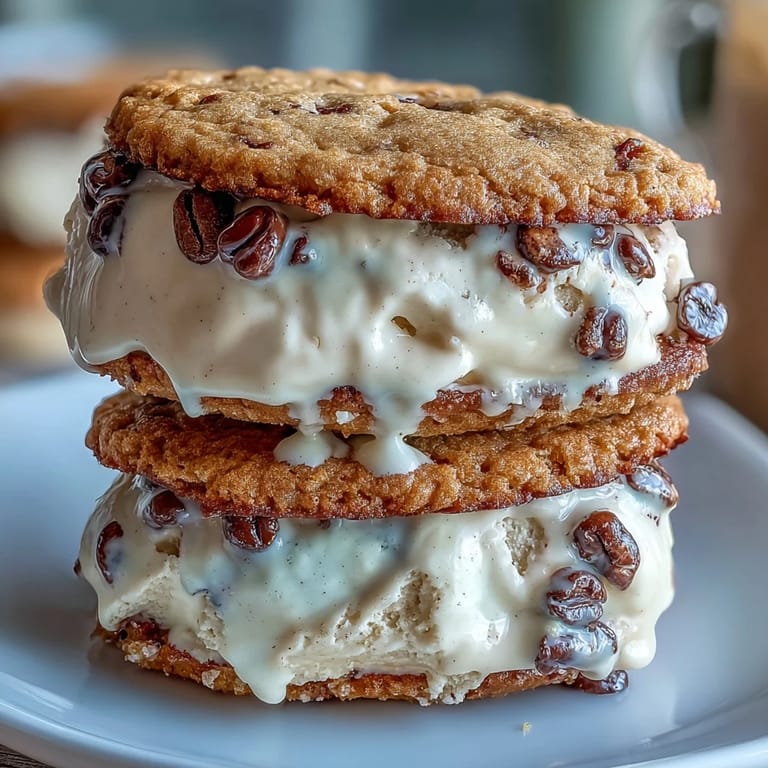
 There's something about the way a vanilla bean Frappuccino tastes on a sticky summer afternoon that makes you want to recreate it at home, and one sweltering July, I decided to trap that feeling between two cookies. The result was these coffee-kissed sandwiches with creamy vanilla bean ice cream, and they became the reason my friends started showing up unannounced at my door. Now whenever I make them, the kitchen fills with the smell of espresso and butter, and suddenly everyone's got their hand in the freezer.
I'll never forget bringing these to a potluck where someone had already planned to serve store-bought ice cream sandwiches, and watching their face when they tasted the real vanilla bean and realized what they were missing. My sister asked for the recipe before she'd even finished the first one, and now she makes them for her kids every summer, which somehow means more to me than any compliment ever could.
Ingredients
- All-purpose flour (1 1/2 cups): The foundation of your cookies, and it needs to be measured by weight if you can manage it, since spooning and leveling always gives me slightly different results.
- Unsalted butter (1/2 cup), softened: Room temperature butter creams into fluffy clouds with the sugars, which is the secret to cookies that stay soft instead of spreading into hockey pucks.
- Light brown sugar (1/2 cup) and granulated sugar (1/4 cup): The brown sugar brings moisture and a subtle caramel note that plays beautifully with the espresso, while the white sugar helps with structure.
- Large egg: This binds everything together and adds richness, so make sure it's truly room temperature or your dough will be lumpy.
- Instant espresso powder (2 tbsp): Dissolved in hot water first to bloom and wake up the flavor, transforming these from plain sugar cookies into something that actually tastes like coffee.
- Vanilla extract (1 tsp): The bridge between the coffee and the vanilla bean ice cream, adding depth without making the cookies taste sweet.
- Baking soda (1/2 tsp) and salt (1/4 tsp): Baking soda helps the cookies spread just enough to stay tender, while salt amplifies every other flavor.
- Heavy cream (2 cups) and whole milk (1 cup): The ratio matters here because too much cream makes the ice cream grainy, while too much milk makes it icy.
- Granulated sugar (3/4 cup): Dissolves completely into the cream mixture, creating a silky custard base without the fuss of cooking.
- Vanilla bean pod or paste (1 whole bean, split and scraped, or 2 tsp paste): Those tiny black specks are real vanilla, and they're worth the splurge because store-bought vanilla extract just doesn't give you that same sophistication.
Tired of Takeout? 🥡
Get 10 meals you can make faster than delivery arrives. Seriously.
One email. No spam. Unsubscribe anytime.
Instructions
- Preheat and prepare:
- Set your oven to 350°F and line two baking sheets with parchment paper, which prevents sticking and gives you an easy cleanup afterward.
- Bloom the espresso:
- Stir your instant espresso powder into hot water and let it cool to room temperature, which opens up the coffee flavor instead of letting it stay harsh and one-dimensional.
- Cream the butter and sugars:
- Beat softened butter with both sugars for about 2 minutes until the mixture looks pale and fluffy, then add your egg and beat until completely incorporated. This is when you add your cooled espresso mixture and vanilla extract, beating until everything is smooth.
- Combine dry ingredients:
- In a separate bowl, whisk together flour, baking soda, and salt, then gently fold this into your wet ingredients until just combined. Don't overmix or your cookies will be tough instead of tender.
- Shape and bake:
- Scoop tablespoon-sized portions onto your prepared sheets about 2 inches apart, flatten each slightly with your hand, and bake for 10 to 12 minutes until set but still soft to the touch. They'll firm up as they cool, so resist the urge to bake them until golden brown.
- Cool completely:
- Transfer cookies to a wire rack and let them cool all the way down, which takes about 30 minutes and is the perfect time to start your ice cream.
- Make the ice cream base:
- Whisk together heavy cream, milk, sugar, vanilla bean seeds (or paste), and salt until the sugar dissolves completely, which takes about 2 minutes of steady whisking.
- Churn the mixture:
- Pour into your ice cream maker and follow the manufacturer's instructions, which usually takes 20 to 25 minutes, then transfer to a freezer-safe container and freeze until firm, about 2 hours.
- Assemble the sandwiches:
- Once everything is cold and firm, scoop about 1/3 cup of ice cream onto the flat side of one cookie, top with a second cookie, and gently press until the ice cream spreads evenly to the edges. Wrap each sandwich in parchment or plastic wrap and freeze for at least an hour so the ice cream re-hardens around the cookies.
 Save to Pinterest
 There's a quiet magic in handing someone a cold, wrapped ice cream sandwich that looks unassuming until they take a bite and suddenly taste espresso and real vanilla dancing together with soft cookies melting on their tongue. Those moments, when someone stops mid-conversation to savor what you've made, are exactly why I keep coming back to this recipe.
Why These Cookies Stay Soft
Most cookie recipes want you to bake until golden brown, but these need to come out while they're still slightly underbaked, which feels wrong until you realize that removing them early is exactly what keeps them tender instead of crispy. The carryover heat from the baking sheet finishes them as they cool, and that's the whole trick.
Storage and Make-Ahead Magic
You can bake the cookies up to three days ahead and store them in an airtight container, which means you can make fresh ice cream sandwiches whenever you want without the full commitment of starting from scratch. The assembled sandwiches freeze beautifully for up to two weeks, wrapped individually, so you've always got a treat waiting in the freezer.
Variations and Finishing Touches
This base recipe is begging for creativity once you've mastered it, and some of my favorite experiments have come from simple additions and rim variations. Don't be afraid to play around with these ideas once you've made the sandwiches a few times and feel confident with the process.
- Roll the edges of assembled sandwiches in crushed espresso beans, mini chocolate chips, or sprinkles before the final freeze for extra texture and visual appeal.
- Stir mini chocolate chips, toffee bits, or even a swirl of salted caramel into the ice cream base before churning for elevated flavor combinations.
- Serve alongside a shot of espresso or a cold brew coffee to complete the Frappuccino-inspired experience and make it feel like a café moment at home.
 Save to Pinterest
 These sandwiches have a way of turning an ordinary Tuesday afternoon into something worth remembering, and that's the real reason they keep showing up in my kitchen over and over again. Make them once, and you'll understand why.
Recipe FAQ
- → How do I keep the sandwiches from melting quickly?
Freeze assembled sandwiches for at least one hour before serving. Keeping them chilled ensures the ice cream stays firm longer.
- → Can I replace espresso powder with brewed coffee?
Espresso powder provides concentrated flavor and dry texture. Brewed coffee may add moisture, affecting cookie consistency.
- → What’s the best way to scoop the ice cream evenly?
Use a cookie scoop or spoon to portion consistent amounts, ensuring uniform layers between cookies.
- → How long should the ice cream churn before freezing?
Churn until thick and creamy as per your ice cream maker’s instructions, then freeze for about two hours to firm up.
- → Are there suggested variations to the flavor profile?
Adding mini chocolate chips or rolling sandwich edges in crushed espresso beans adds texture and intensifies coffee flavors.