 Save to Pinterest
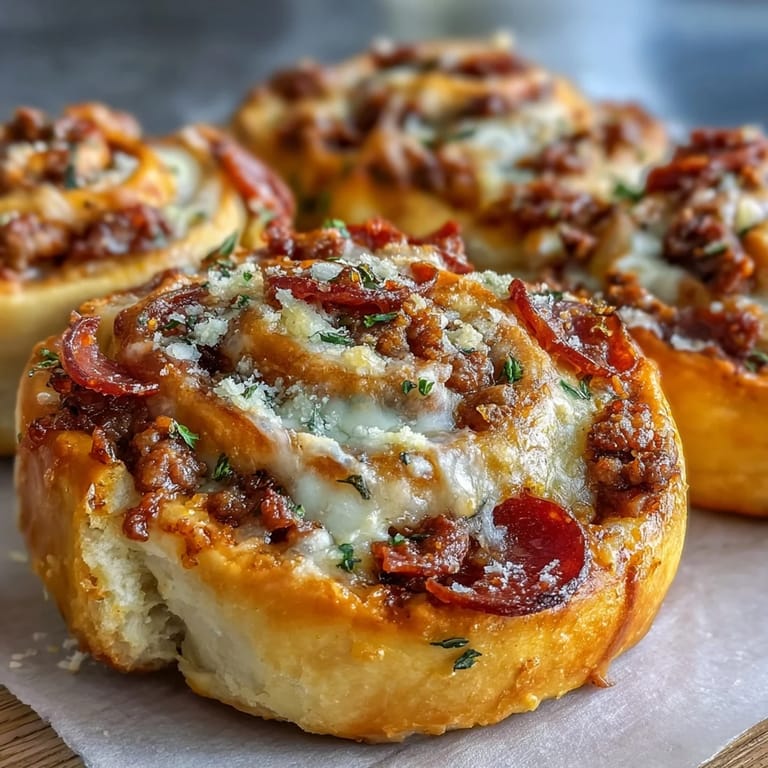
 My kitchen counter was covered in flour dust, and I was craving pizza but refusing to blow my macros. I'd been experimenting with Greek yogurt dough for weeks, and this time I decided to stuff it with pepperoni and seasoned beef instead of just topping it. The smell that filled my apartment as these golden rolls baked was enough to make my neighbor knock and ask what I was making. I handed her two warm rolls through the doorway, and she texted me an hour later begging for the recipe.
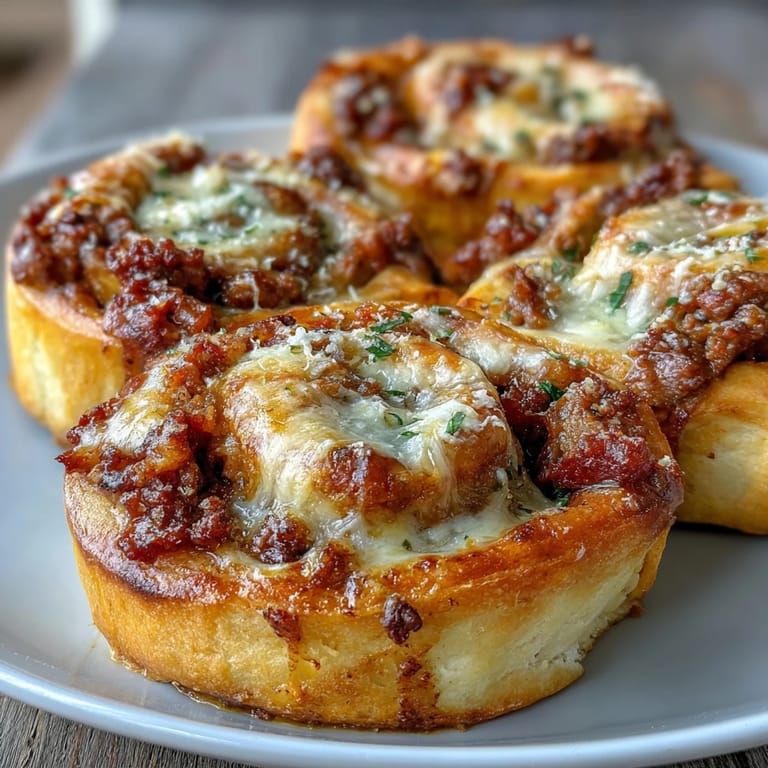
I made these for a potluck at the gym once, and they disappeared faster than the brownies. People were shocked when I told them the dough was made with Greek yogurt, not traditional pizza dough. One guy even asked if I'd used protein powder, assuming that was the secret. The truth is, it's just smart ingredient swaps and a little bit of rolling, and suddenly you've got a snack that tastes indulgent but fits your goals.
Ingredients
- Plain Greek yogurt (nonfat or low fat): This is the base of your protein-packed dough, creating a soft, slightly tangy texture that holds together beautifully without any yeast or long rise times.
- Self-rising flour: The leavening agents already mixed in give the dough its lift and fluffiness, so if you don't have it on hand, just whisk baking powder and salt into all-purpose flour.
- Egg: Binds the dough and adds richness, plus a little extra protein to keep the macros strong.
- Garlic powder and salt: These season the dough itself, so every bite has flavor even before you get to the filling.
- Lean ground beef: Using 5% fat or less keeps the rolls from getting greasy, and browning it with Italian herbs builds a savory base that tastes like real pizza.
- Turkey or beef pepperoni slices: They add that classic pizza punch without overwhelming the roll, and turkey pepperoni keeps the fat content even lower if you're tracking closely.
- Shredded part-skim mozzarella cheese: Melts into gooey pockets throughout the filling, giving you that cheese pull without too much saturated fat.
- Pizza sauce: A thin layer adds moisture and tang, tying all the flavors together like a traditional pizza would.
- Dried Italian herbs: Oregano and basil bring that pizza shop aroma right into your kitchen.
- Olive oil: Brushing the tops before baking gives them a golden, slightly crispy finish.
- Grated Parmesan cheese: Sprinkled on top, it creates a savory crust that crisps up in the oven.
- Dried parsley or Italian herbs: A final sprinkle adds color and a fresh herby note when they come out of the oven.
Tired of Takeout? 🥡
Get 10 meals you can make faster than delivery arrives. Seriously.
One email. No spam. Unsubscribe anytime.
Instructions
- Preheat and Prep:
- Set your oven to 400°F (200°C) and line a baking sheet with parchment paper. This prevents sticking and makes cleanup a breeze.
- Brown the Beef:
- Cook the ground beef in a nonstick skillet over medium heat, breaking it into small crumbles as it browns. Stir in black pepper and Italian herbs, then let it cool slightly so it doesn't melt the dough when you roll.
- Make the Dough:
- In a large bowl, combine Greek yogurt, self-rising flour, egg, garlic powder, and salt until a sticky dough forms. Turn it out onto a floured surface and knead for 2 to 3 minutes until it's smooth and pliable.
- Roll It Out:
- Use a rolling pin to shape the dough into a rectangle about 12 by 10 inches. Keeping the thickness even helps the rolls bake uniformly.
- Spread the Sauce:
- Evenly spread pizza sauce over the dough, leaving a half-inch border around the edges. This border keeps the filling from oozing out when you roll.
- Add the Filling:
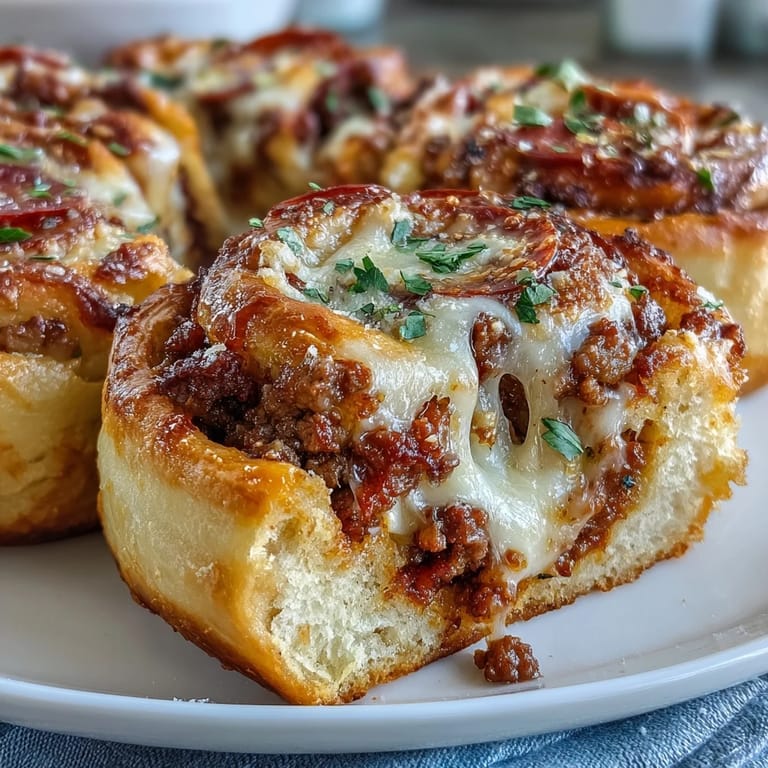
- Scatter the cooked beef, pepperoni slices, and mozzarella cheese over the sauce. Distribute everything evenly so each roll gets a balanced bite.
- Roll and Slice:
- Starting from one long edge, tightly roll the dough into a log. Use a sharp knife to slice it into 12 equal pieces.
- Arrange and Top:
- Place the rolls cut-side up on the baking sheet, brush lightly with olive oil, and sprinkle with Parmesan and dried parsley. The oil helps them brown and the cheese adds a savory crust.
- Bake:
- Bake for 18 to 22 minutes, until the tops are golden brown and the cheese is bubbling. Let them cool slightly before serving so you don't burn your tongue on molten cheese.
 Save to Pinterest
 One Saturday morning, I reheated a few of these rolls for breakfast and realized they tasted even better the next day. The flavors had melded together overnight, and the dough had this perfect chewy texture that made me wonder why I ever bothered with leftover pizza. My boyfriend grabbed three on his way out the door for a hike, and when he got back, he said they kept him fueled the whole trail without feeling sluggish.
Making the Dough Work for You
Greek yogurt dough is forgiving, but it does need a light hand. If it feels too sticky, add a tablespoon of flour at a time until it's workable, but don't go overboard or the rolls will turn dense. I learned this after adding too much flour once and ending up with rolls that tasted more like biscuits than pizza. The dough should feel slightly tacky but not cling to your fingers. When you roll it out, flour your surface and rolling pin lightly, and if it starts to stick, lift it gently and dust underneath.
Customizing the Filling
This recipe is a template, not a rulebook. I've swapped the beef for ground turkey, added finely chopped bell peppers, and even stirred in some fresh spinach when I had it wilting in the fridge. One time I used spicy Italian sausage instead of pepperoni, and the rolls had this incredible kick that my spice-loving friends couldn't get enough of. If you're vegetarian, skip the meat entirely and load up on mushrooms, olives, and extra cheese. The dough holds up to whatever you throw at it.
Storing and Reheating
These rolls are meal prep gold. Once they've cooled completely, I stack them in an airtight container with parchment paper between the layers and store them in the fridge for up to five days. For longer storage, I freeze them in a single layer on a baking sheet, then transfer them to a freezer bag once they're solid. When I'm ready to eat, I reheat them straight from frozen at 350°F for about 12 minutes, and they come out just as good as fresh. Sometimes I'll pop one in the microwave for 45 seconds if I'm in a rush, but the oven gives you that crispy edge.
- Refrigerate in an airtight container for up to 5 days.
- Freeze in a single layer, then bag them for up to 3 months.
- Reheat from frozen at 350°F for 10 to 12 minutes, or microwave for 45 seconds if you're short on time.
 Save to Pinterest
 These rolls have become my go-to whenever I need something that tastes like a treat but keeps me on track. They've fueled early morning workouts, late-night study sessions, and more than a few road trips. I hope they do the same for you.
Recipe FAQ
- → What makes the dough high in protein?
The dough combines plain Greek yogurt with self-rising flour and an egg, creating a protein-rich base that's softer and more tender than traditional dough while packing 14g of protein per roll.
- → Can I freeze these rolls for later?
Yes, these freeze exceptionally well. Once cooled, store in an airtight container or freezer bag for up to 3 months. Reheat from frozen at 350°F (175°C) for 10–12 minutes until heated through.
- → What can I use instead of self-rising flour?
Mix 2 cups all-purpose flour with 3 teaspoons baking powder and 1/2 teaspoon salt. This combination creates the same rising effect as self-rising flour in the dough.
- → Can I make these with different proteins?
Absolutely. Substitute lean ground turkey or chicken for the beef. You can also use turkey pepperoni or add vegetables like finely chopped bell peppers and spinach to increase nutritional variety.
- → How do I prevent the filling from leaking during baking?
Leave a 1/2-inch border when spreading sauce, roll the dough tightly from the long edge, and place rolls cut-side up on the baking sheet. The border helps seal everything inside while baking.
- → What's the best way to reheat leftover rolls?
For best results, reheat in a 350°F (175°C) oven for 5–8 minutes until warmed through. Microwaving works but may soften the crust. If frozen, add a few minutes to the heating time.